


Lightroom Classic
- Download your presets and save the .zip file to your desktop.
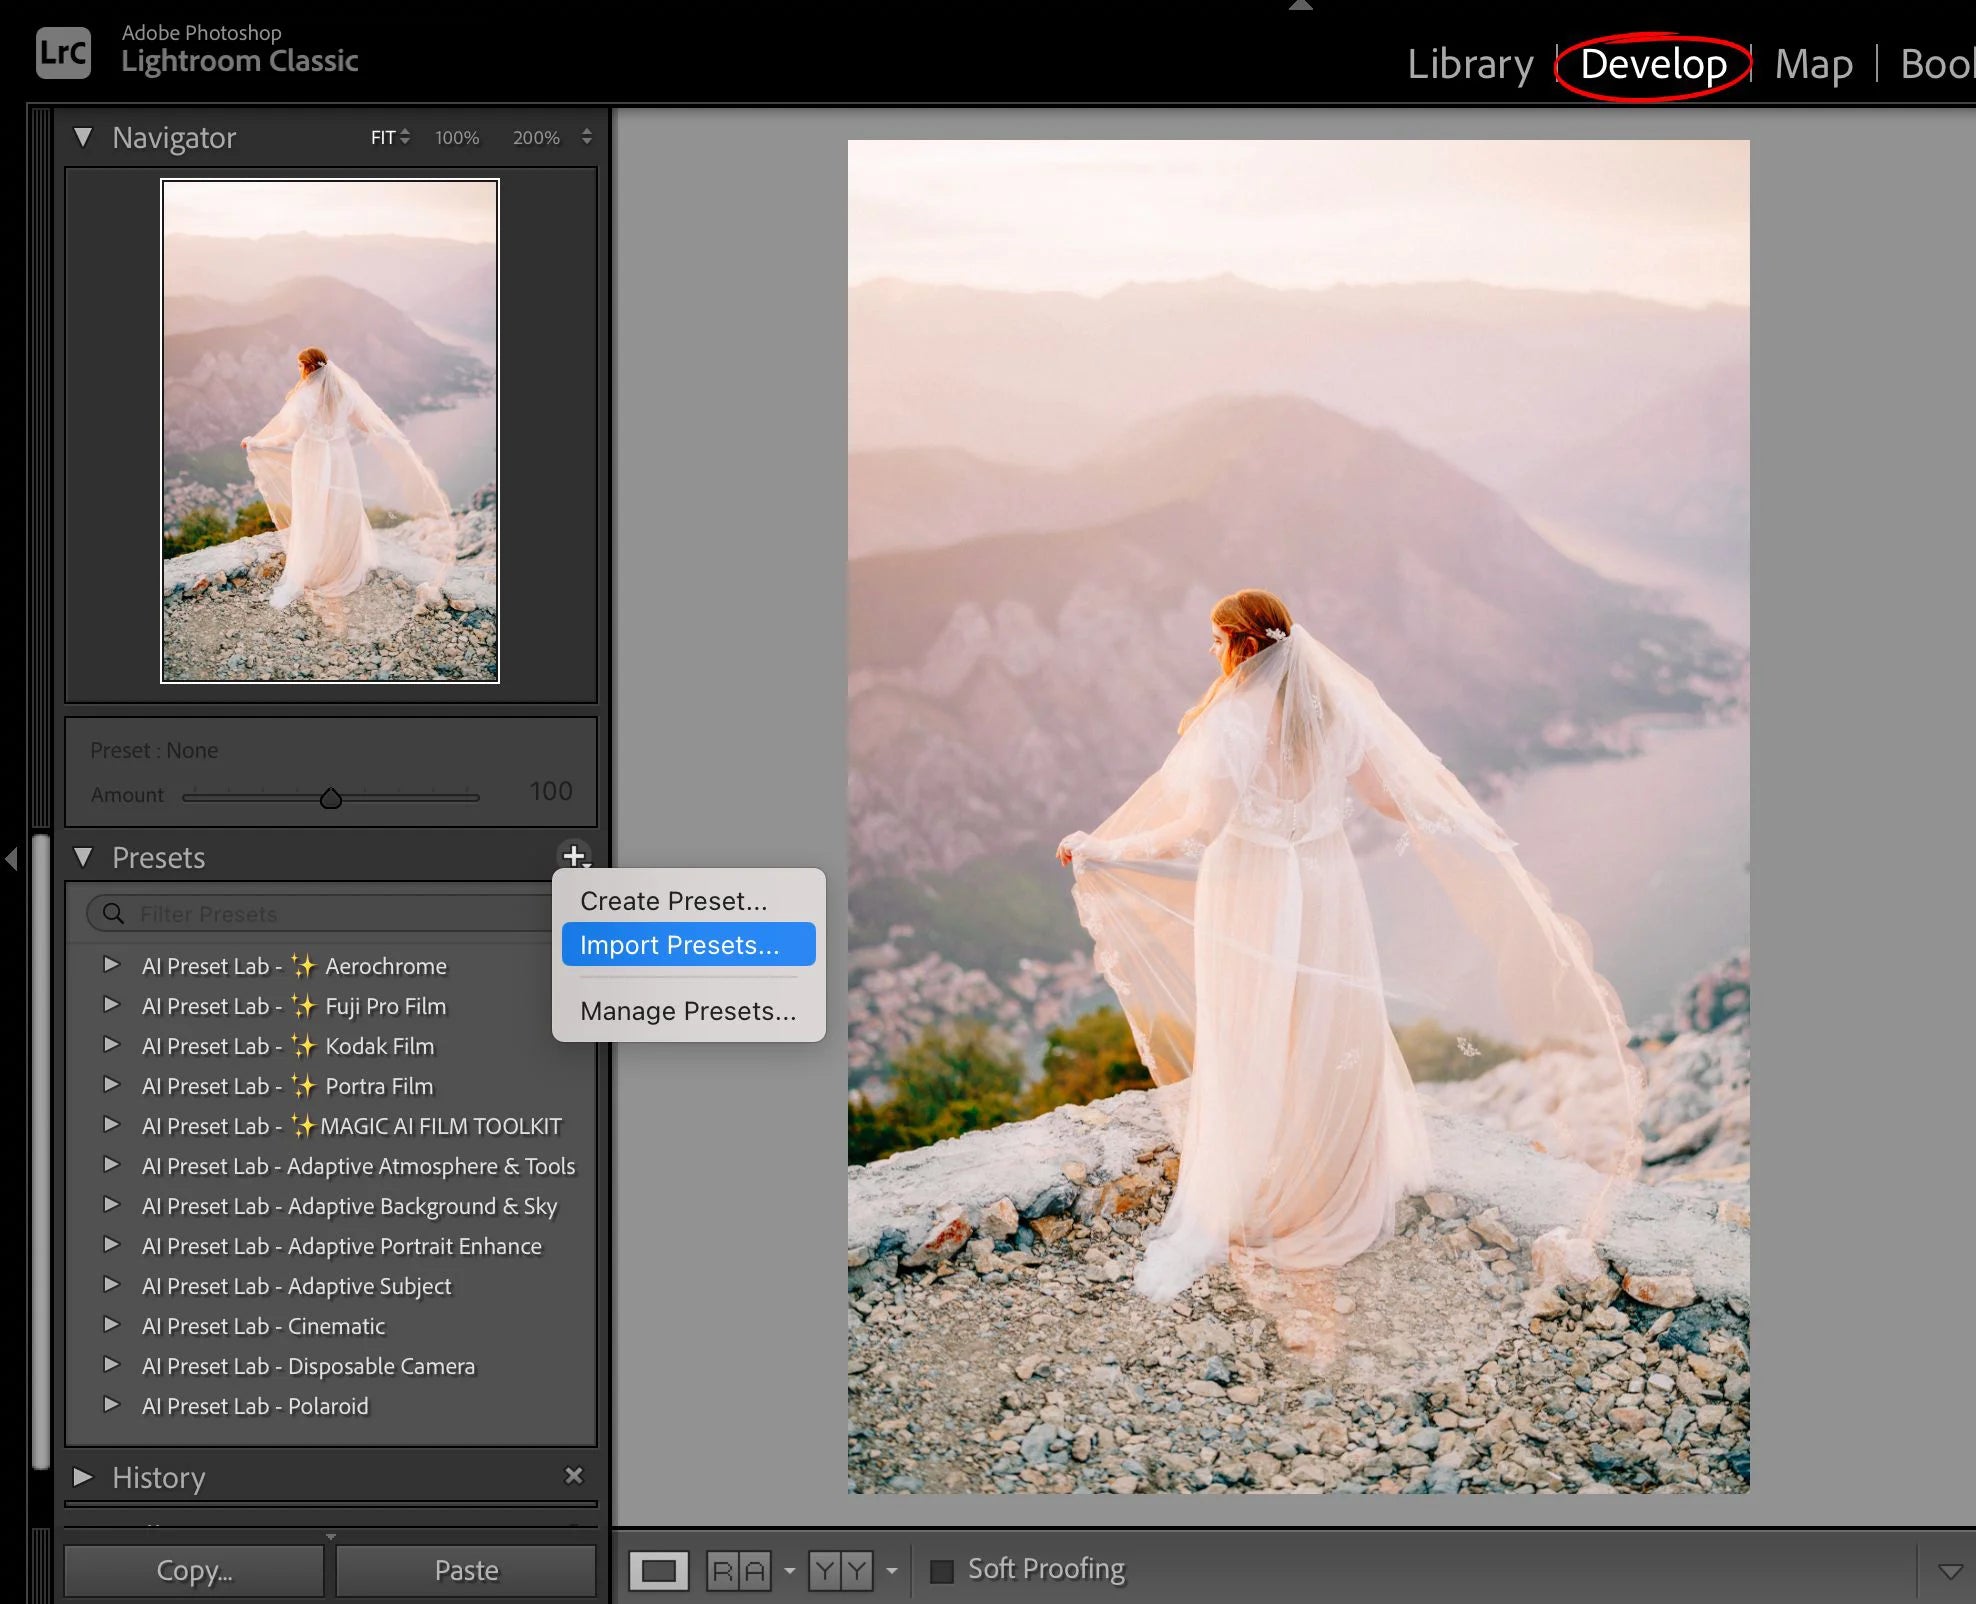
- Open Lightroom Classic and navigate to the Develop module.
- In the Presets panel, click on the + icon and select Import Presets...
- In the new window that opens, navigate to the preset zip file and select it. (You can also import individual .xmp files if you prefer.)
- You’re done! Your presets will now be installed and ready to use in Lightroom Classic.
Lightroom CC
- Download your presets and save the .zip file to your desktop.
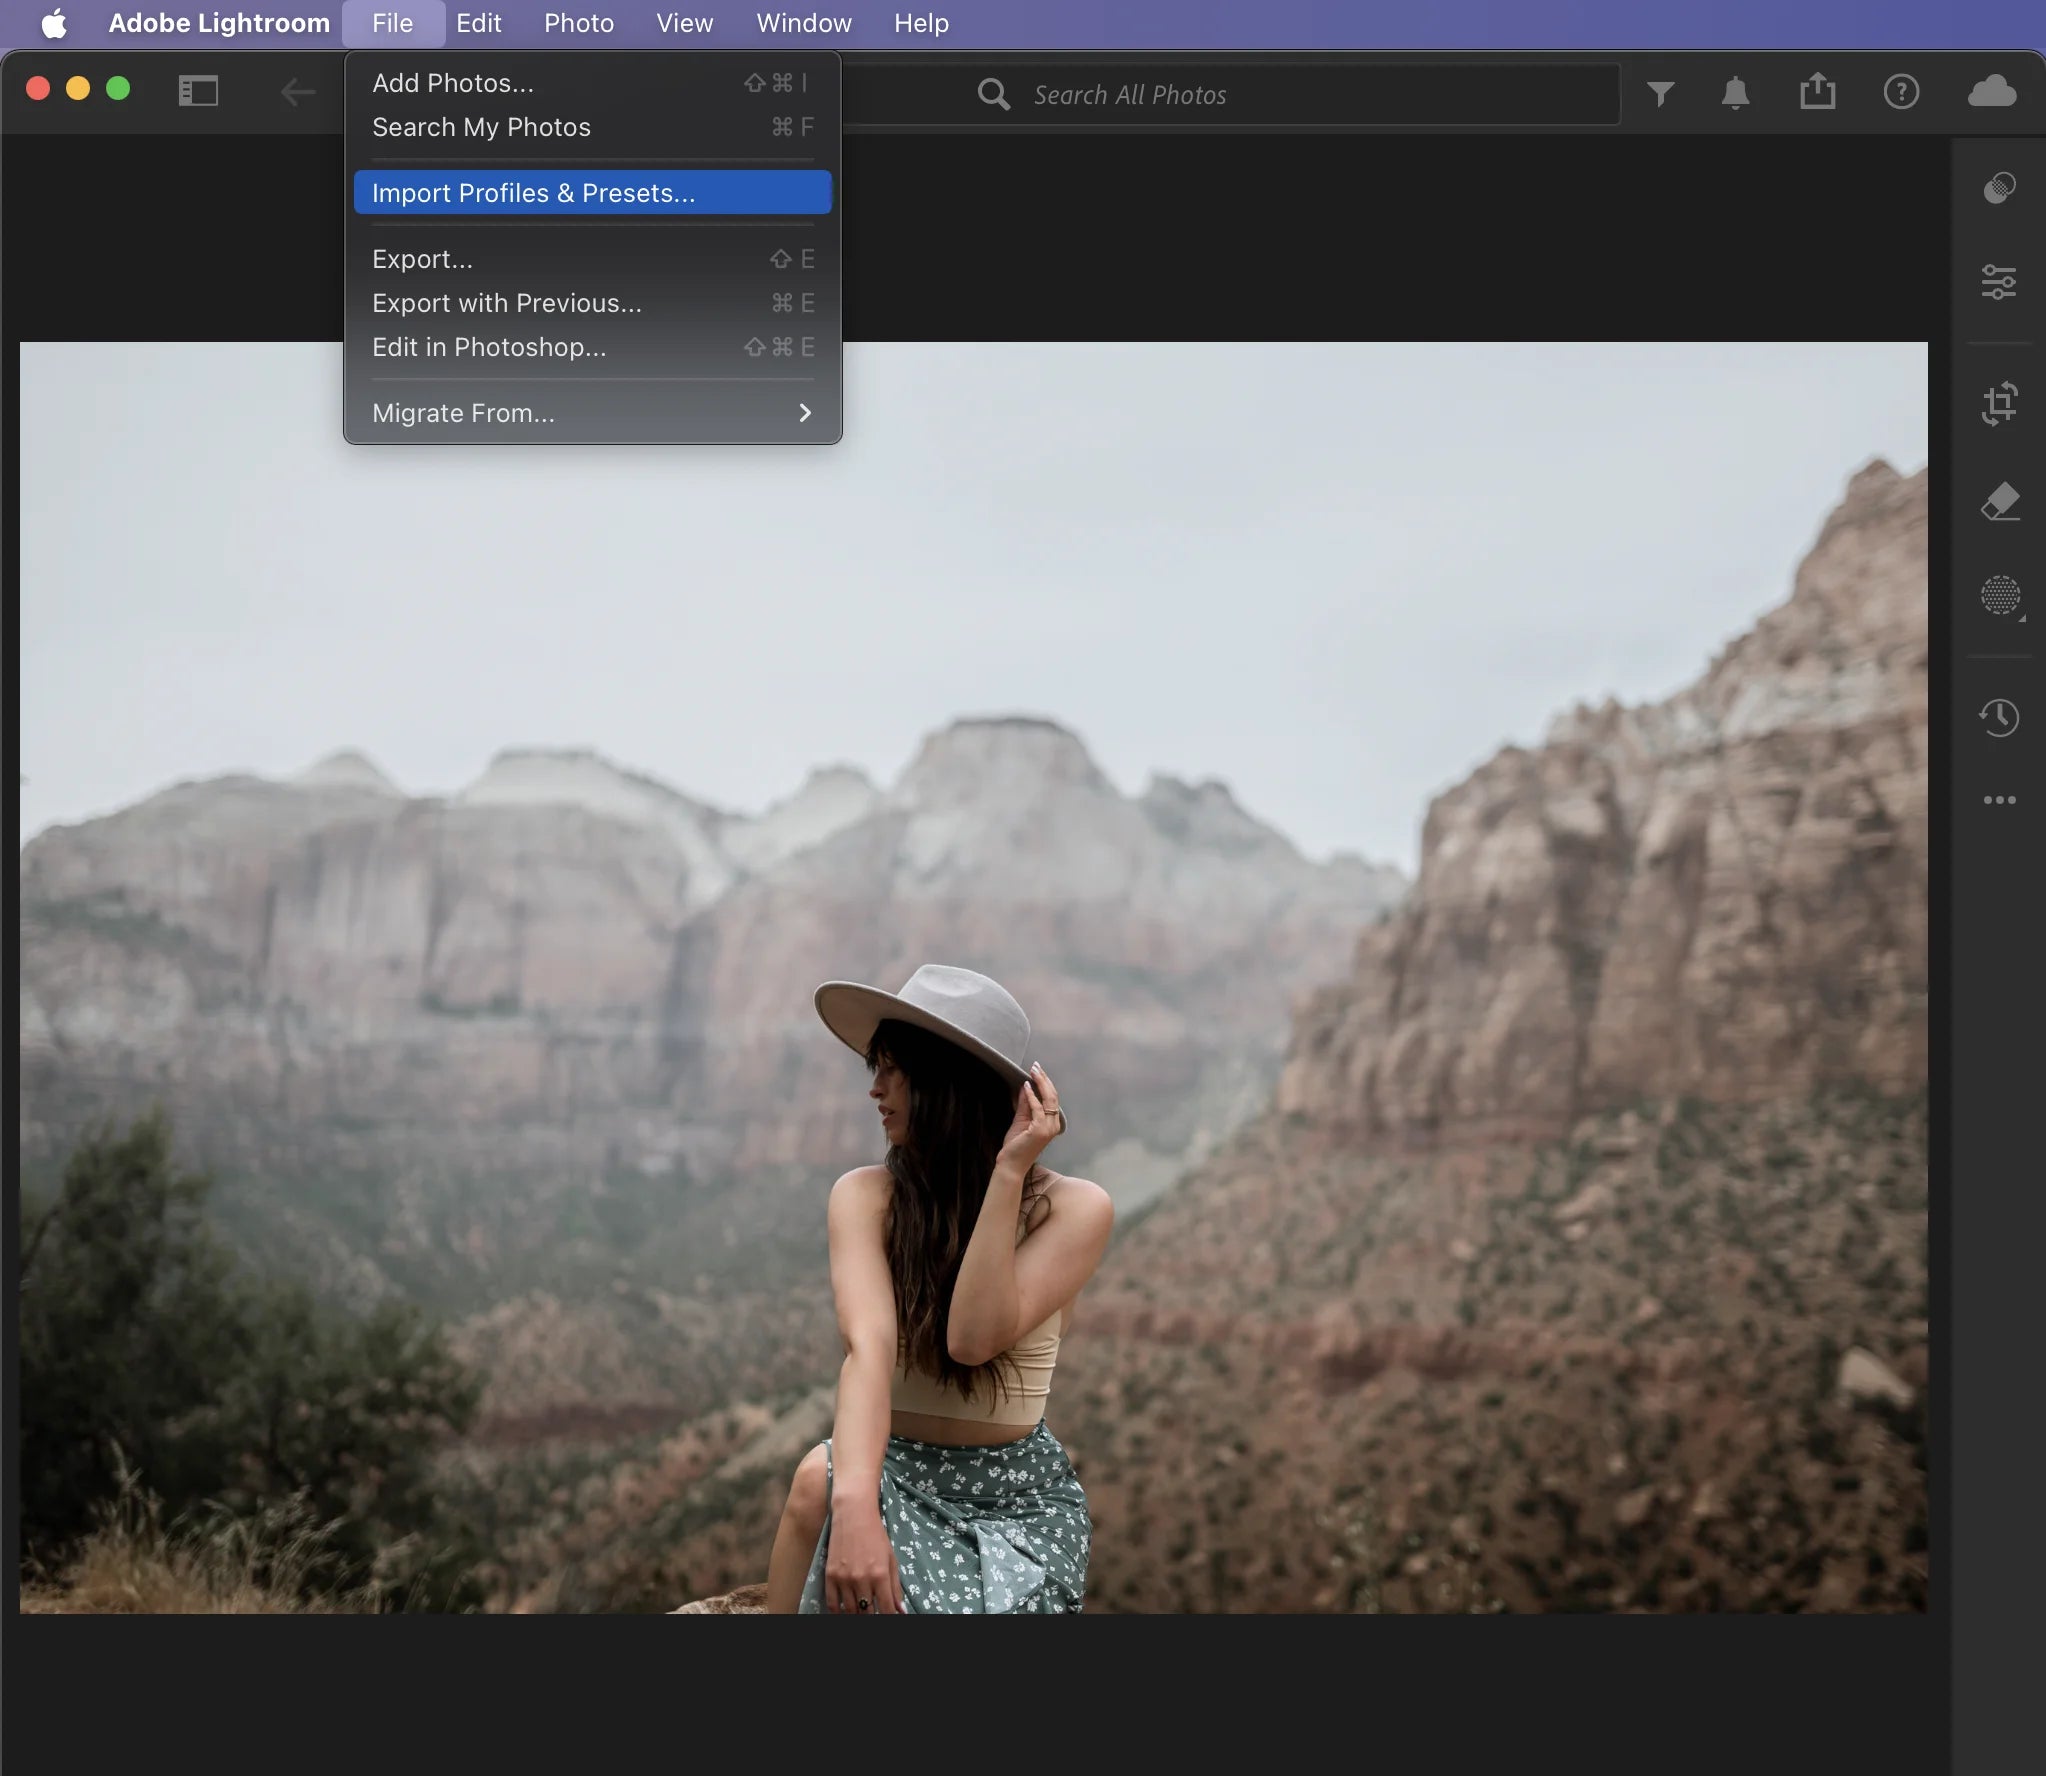
- Open Lightroom CC. From the top menu bar, select File, then choose Import Profiles & Presets... from the submenu.
- In the window that opens, navigate to the preset zip file and select it. (You can also import individual .xmp files if you prefer.)
- Alternatively, you can import presets directly from the Presets panel. Click the three-dot icon (•••) at the top of the panel, then select Import Presets from the dropdown menu.
- That’s it! Your presets will now be installed and ready to use in Lightroom CC.
Photoshop ACR - Adobe Camera Raw
- Download your presets and save the .zip file to your desktop.
- Open a photo in Photoshop on your desktop.
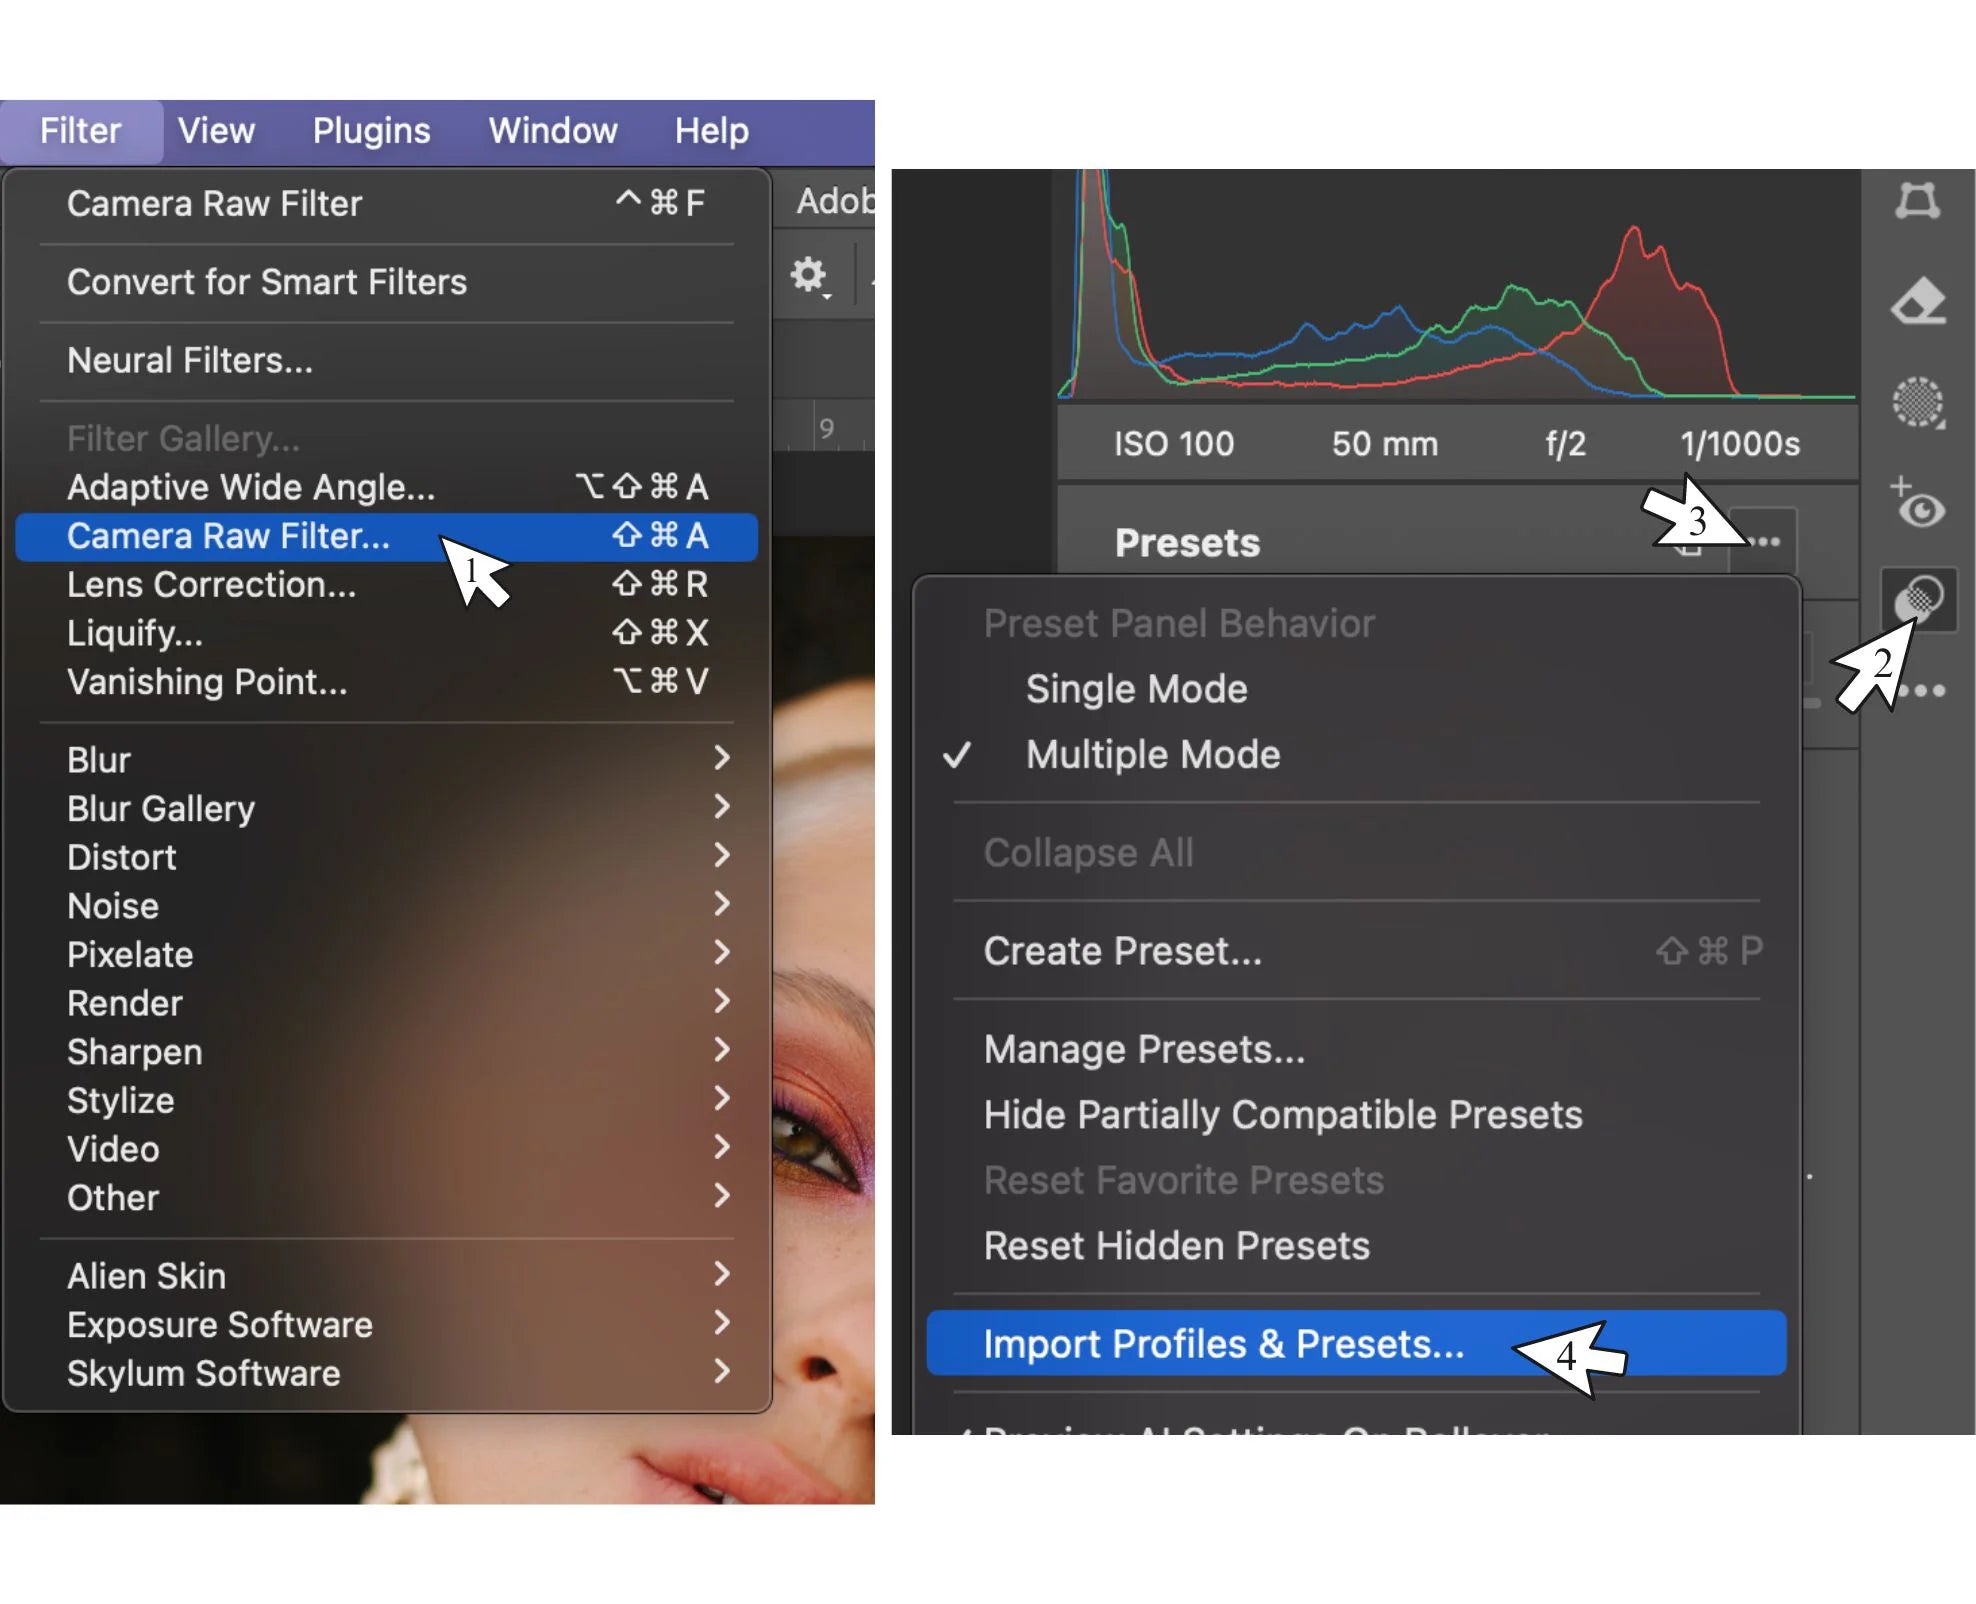
- From the top menu, click Filter, then select Camera Raw Filter...
- In Camera Raw, click the Presets icon on the right-hand toolbar (two interlocking circles).
- Click on the three-dot menu (•••) at the top of the Presets panel, then choose Import Profiles & Presets...
- In the window that opens, navigate to the preset zip file and select it. (You can also import individual .xmp files if you prefer.)
- That's it! Your presets are now installed and ready to use in Adobe Camera Raw.
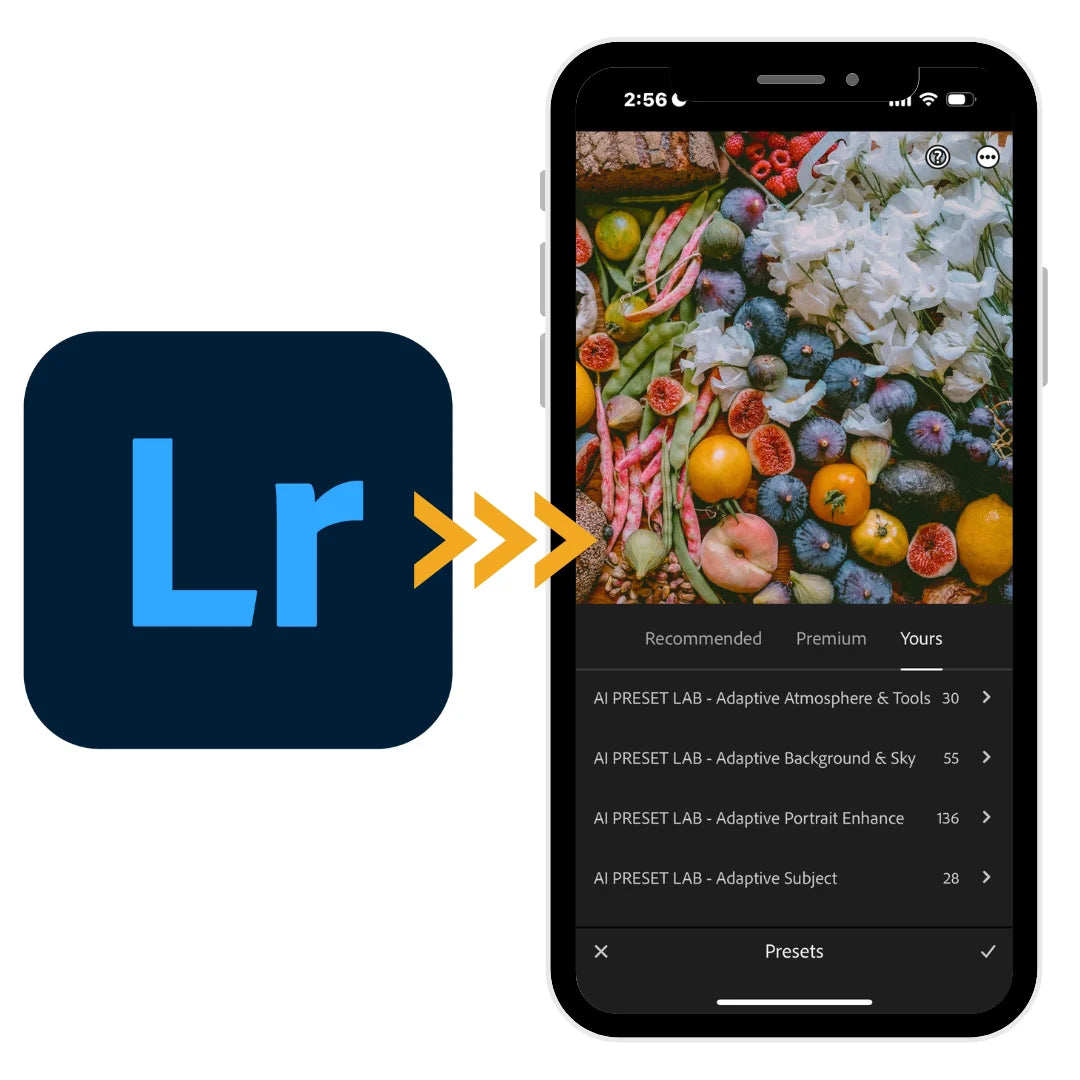
Lightroom Mobile (iOS & Android)
You have two easy options for installing your presets in the Lightroom Mobile App:
Option 1: Sync from Lightroom CC (Recommended)
- First, install your presets in Lightroom CC for desktop.
- As long as you're signed in to the same Adobe account on both desktop and mobile, your presets will automatically sync to your Lightroom Mobile App.
- Once synced, you can access and use your presets directly in the app.
Option 2: Install Directly into Lightroom Mobile
- Download the preset .zip file to your Android or iOS device.
- Open a photo in the Lightroom Mobile App.
- Tap the Presets icon (two interlocking circles)
- In the Preset panel, tap the three-dot menu (•••)
- Select Import Presets.
- A window will open, locate and select the preset zip file or the individual .xmp files.
- That’s it! Your presets will now be installed and ready to use in Lightroom Mobile.
Explore Our Presets
-
 Adaptive Magic AI Toolbox PresetsAdaptive Magic AI Toolbox Presets
- Regular price
-
$27.00 - Regular price
-
$47.00 - Sale price
-
$27.00
Quick view
-
 Disposable Camera PresetsDisposable Camera Presets
- Regular price
-
$47.00 - Regular price
-
$47.00 - Sale price
-
$47.00
Quick view
-
 Magic AI Fuji Pro Film PresetsMagic AI Fuji Pro Film Presets
- Regular price
-
$47.00 - Regular price
-
- Sale price
-
$47.00
Quick view
-
 Magic AI Portra Film PresetsMagic AI Portra Film Presets
- Regular price
-
$47.00 - Regular price
-
- Sale price
-
$47.00
Quick view
-
 Magic AI Kodak Film PresetsMagic AI Kodak Film Presets
- Regular price
-
$47.00 - Regular price
-
$47.00 - Sale price
-
$47.00
Quick view
-
 Magic AI Aerochrome PresetsMagic AI Aerochrome Presets
- Regular price
-
$47.00 - Regular price
-
- Sale price
-
$47.00
Quick view


